Open topic with navigation
Instant Imaging
Instant Imaging enables you to image or manually inspect a plate without a barcode label. This option is specific to Rock Imager 2, and the Benchtop versions of SONICC and FRAP.
When you create an instant imaging session, Rock Maker creates a special folder for your experiment and images called Instant Imaging. After the imaging process, you can use Rock Maker to move the experiment file to a more appropriate location in the Explorer tree.
Prerequisites
- The plate is stationed on Rock Imager.
To image with Instant Imaging:
- Start an Instant Imaging session.
- Go to the Imager menu and select Instant Imaging.
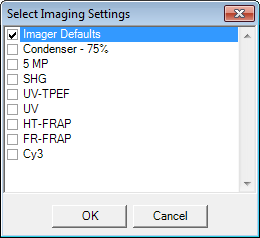
- Select which imaging settings you want to use in your imaging process.

- Click OK to confirm.
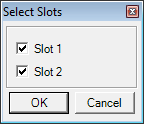
- Select which "slot" to image and scan, then click OK. In each imager, slot 1 is on the left and slot 2 is on the right.

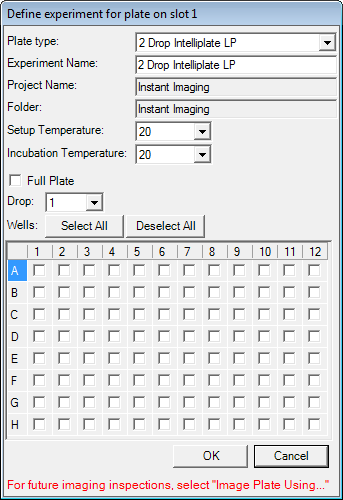
- Select your plate type from the Plate Type menu.

- Name your experiment. The Project Name and Folder fields are automatically assigned.
- Set the Setup Temperature and Incubation Temperature.
- Tell Rock Imager which wells you want to image.
- If you want to image all drop positions at each well, check the box next to Full Plate.
- If you only want to select a certain drop location at each well, select the drop location you used (i.e. 1, 2) from the Drop list.
- To image drops at specific wells, click the box at that location.
- Click Select All to image drops at all of the plate’s wells. After clicking Select All, you can uncheck certain wells if you don’t want to image them.
- Select Instant Imaging options for a plate at slot 2. Skip this step if you are only using slot 1.
- Click OK to complete Instant Imaging setup for the plate at slot 1/2.
Related Topics
|
|

|
| RIC-V216R216
|
|


